Aligning the grid
In Tarrasque.io, you align the grid to your map, not the other way around. Some maps are not tiled correctly, which can lead to problems when setting up a custom grid on other VTTs. The grid settings in Tarrasque.io are flexible enough to allow you to setup your grid regardless of the origin of your map.
Here's a quick tutorial to help you grid your first map properly:
Using a grid is highly recommended. With a grid, tokens snap correctly to the grid squares while moving or resizing, and shapes are much easier to draw and control.
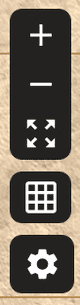
On the top right of your battle map, under the Zoom Controls, you'll find the Grid. Once clicked, this button will open up the grid settings.
The grid updates in real-time as you modify the values, so you can experiment with it until you find a setting that works for you.
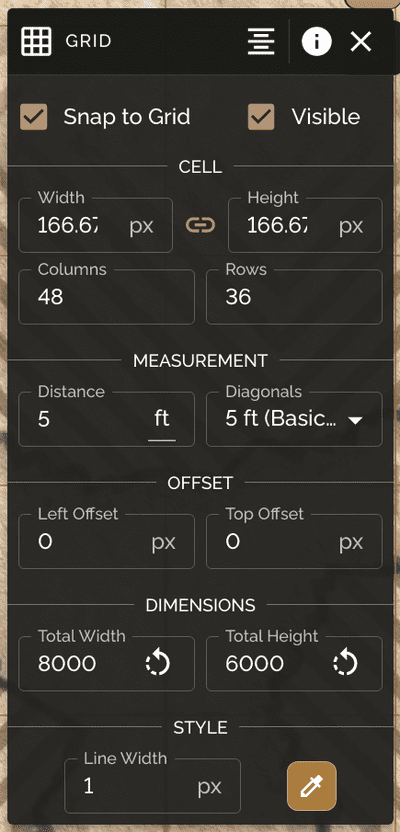
- Snap to Grid checkbox will enable the grid for this map and allow tokens and shapes to snap to it.
- Visible checkbox will hide the grid but still keep it enabled so that you can show more of your map.
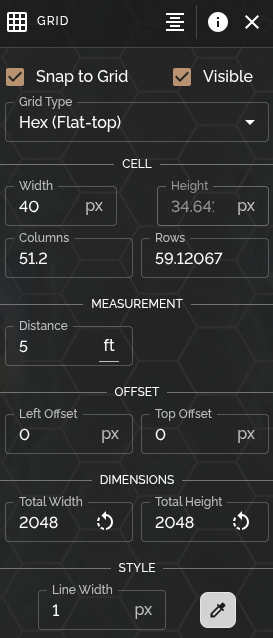
- Grid Type lets you choose between a Square grid or a Hex grid (Pointy-top or Flat-top). Switching to a hex grid changes how tokens snap and how distance is measured — see Hex grids below.
- The Cell Width and Cell Height properties indicate how big each grid cell is. If you're using a map generated from a tool like DungeonDraft, this will be the only thing you need to change.
- The Columns and Rows properties allow you to say "I want a map with 30 grid cells on the x-axis, and 40 on the y-axis". It can be very useful for aligning the grid on maps which you don't know the exact square width for.
- Measurement Distance is used by the Measure tool to correctly measure each grid cell's distance from the next. You can also change the "ft" to any other unit of measurement you'd like.
- Measurement Diagonals is used by the Measure tool to correctly measure movement across diagonal grid squares. The available options are as below:
- 5 ft (Basic Rules): Every diagonal counts as 5 ft.
- 5-10 ft (Optional Rule): Alternate between 5 and 10 ft for each diagonal.
- 7 ft (Real Distance): Realistic distance between two points.
- Left Offset and Top Offset allow you to set a margin from where the grid starts on the map. This is especially handy for maps which contain custom art on the borders of the map, thus making it not fit properly.
- Total Width and Total Height of the grid defaults to the total dimensions of the battle map image, but you can change that if you want to make the grid only target a specific area.
- Line Width and Line Color allow you to customize the color and size of your grid lines. Up in Mount Celestia? Use thin white lines. Down in a smelly swamp? Green thick lines it is.
After setting up the grid, you can set the Line Width to 0 to get all the benefits of a grid without it being visible!
It's recommended that you start placing tokens only after you've finished setting up the grid, because tokens don't resize to fit the new grid automatically.
Hex grids
In addition to the standard square grid, you can use a hex grid instead — great for wargame-style maps or if you just prefer the hex aesthetic. Choose Hex (Pointy-top) or Hex (Flat-top) from the Grid Type dropdown.
- Pointy-top hexes point up and down, with rows offset every other row.
- Flat-top hexes have a flat edge on top and bottom, with columns offset every other column.
Hex grids behave a little differently than square grids:
- Tokens and shapes snap to the nearest hex center instead of a simple grid cell.
- Cell Height is locked and calculated automatically from Cell Width to keep hexes proportional — only Cell Width is editable.
- The Measurement Diagonals rule doesn't apply on a hex grid — distance is simply the number of hexes crossed, multiplied by your Measurement Distance.